
Essential Performance Parts for Custom E-Moto Builds
Essential performance parts for custom e-moto builds, from controllers and suspension to supermoto wheel sets and brake upgrades. Plan your build right.

Last Updated: October 22, 2026
Quick Summary
The essential performance parts for custom e-moto builds start with the controller, which sets the power ceiling for everything downstream. From there, match the motor and battery to the controller, then add brakes, suspension, wheels, drivetrain and ergonomics in that order, checking fitment before you buy.
- Pick your controller first because it sets the ceiling for throttle response and peak power delivery.
- The EBMX X-9000-V3 lists a 50kW output, 1000A phase current and 48-100V working voltage.
- The Ventus 28 kW motor begins limiting power at a 130 deg C thermal limit and cuts fully at 150 deg C.
- The Warp 9 FastAce suspension bundle is tuned for riders in the 175-220 lb weight range.
- The EBMX extended swingarm adds 60mm of wheelbase and requires a shock with a higher spring rate.
Table of Contents
- Start With a Controller, Not a Shopping Cart
- The Electric Dirt Bike Controller Upgrade That Sets the Ceiling
- Motor, Battery and Thermal Management: Where Power Actually Comes From
- An Electric Dirt Bike Suspension Upgrade You Can Feel on the First Ride
- The Electric Dirt Bike Brake Upgrade That Matches New Speed
- E-Moto Supermoto Wheel Set: What Changes When You Swap Wheels
- Drivetrain, Swingarm and Ergonomics: The Supporting Cast
- Build Order, Compatibility Checks and What to Ignore
- Frequently Asked Questions
Start With a Controller, Not a Shopping Cart
The biggest mistake in custom e-moto builds is buying performance parts in the order they look exciting: wheels, bars, lights, then power. That wastes money, because the controller sets the ceiling for everything downstream.
That is why the essential performance parts for custom e-moto builds start here. Change the controller and you change throttle response, peak power delivery, and how the motor behaves under load.
The Electric Dirt Bike Controller Upgrade That Sets the Ceiling
An electric dirt bike controller upgrade is the highest-use change you can make, because it governs how the motor, battery, and throttle work together. Everything else either supports that triangle or decorates it.
The EBMX X-9000-V3 is the reference point we recommend for serious builds.

Programmable controllers are only as good as their firmware support, so ask what motors are pre-tuned before you buy.
Motor, Battery and Thermal Management: Where Power Actually Comes From
Power comes from the motor and the pack, but it survives only if heat is managed. The Ventus 28 kW light e-moto motor lists 62N.m of max torque, a 28kW peak, a 48-100V working voltage, and a 130 deg C thermal limit where it begins limiting power, with a full cut at 150 deg C.

Battery management matters just as much. A lithium-ion pack with a capable battery management system protects cells from over-current and over-temperature and keeps voltage sag manageable at peak power. Pairing a high-output pack with a controller that can read its limits gives consistent delivery.
An Electric Dirt Bike Suspension Upgrade You Can Feel on the First Ride
Suspension is the upgrade riders notice immediately, because it changes what the bike does under braking, on landings, and through chatter. It is also where fitment gets complicated.
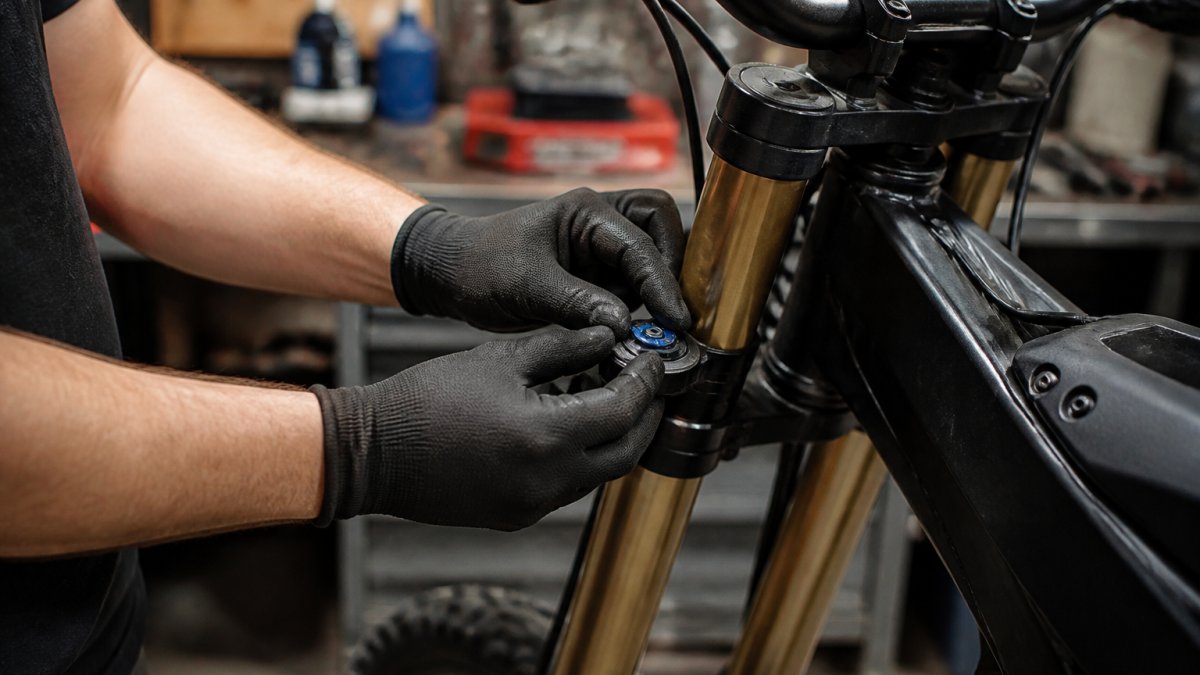
Start with spring rate matched to rider weight. The Warp 9 FastAce suspension bundle is tuned for aggressive riders in the 175-220 lb rider weight range, with custom valving, a 60 lb spring rate, and premium 5wt Motul synthetic oil.
If you want a bigger step, the Sirris F43 CMX front fork pairs an oversized 43 mm chassis with the CMX (Compact Motocross) tuned closed-cartridge damper, nearly 30 clicks of quick external adjustment, and 220 mm travel.
A fork that raises the front without a matching rear change will feel unbalanced, so treat suspension as a system, not a single part.
The Electric Dirt Bike Brake Upgrade That Matches New Speed
More speed demands more stopping power, and stock brakes rarely keep up once you add a controller and motor. An electric dirt bike brake upgrade is the cheapest safety margin in the build. The ION 250mm floating rotor kit uses 250mm x 2.3mm floating rotors for superior braking performance, includes adapter brackets for proper caliper alignment (front and rear), and ships with mounting hardware.

E-Moto Supermoto Wheel Set: What Changes When You Swap Wheels
An e-moto supermoto wheel set changes gearing, grip, and how the bike turns, all at once. Smaller, wider wheels with street-oriented tires sharpen turn-in and change your effective gear ratio through overall diameter, which affects acceleration and top speed.
The Warp 9 17" supermoto wheel set runs a 17 × 2.15" Front / 17 × 2.50" Rear, with options for bare wheels that reuse your OEM rotor and sprocket, or upgraded 220mm rotors with the required brackets and your choice of sprocket tooth count.
If you want a custom setup instead, the Warp 9 custom e-moto wheel is laced and trued to order around a Warp 9 hub, with rear wheels including a sprocket in your chosen tooth count. Build times average two to six weeks, so plan the season around it.
Chain tension and sprocket sizing deserve attention here. Changing wheel diameter without revisiting gearing leaves performance on the table.
Drivetrain, Swingarm and Ergonomics: The Supporting Cast
The supporting parts decide whether the headline upgrades hold together. Drivetrain, chassis length, and cockpit setup are where a good build becomes a reliable one.
Drivetrain: belts, chains, and the wear items riders forget
A primary drive belt is a wear item and a weak link. The Dayco primary drive belt is listed for several popular platforms, and it is the kind of part riders forget until it fails mid-ride.
With a chain final drive, chain length is set by the distance between the countershaft and the rear sprocket, which changes the moment you fit an extended swingarm or a different rear sprocket. The EBMX extended swingarm listing provides chain length by tooth count for exactly this reason: pick your sprocket tooth count first, then size the chain to the new center distance.
Sprocket tooth count is the other half of the gearing equation. Going up in the rear (or down in the front) trades top speed for acceleration and adds chain load; going the other way does the reverse.
Swingarm: what 60mm of wheelbase actually does
Chassis length changes stability and load paths. The EBMX extended swingarm adds 60mm (+2.4") Longer Wheelbase and 220mm (+3/4") suspension travel (with EBMX YSS shock and linkage), and its listing is direct: a longer swingarm increases the forces into your rear shock and must be matched to a high quality shock with a higher spring rate. OEM style shocks will not perform well with this upgrade.
Ergonomics: cockpit setup as a control variable
Ergonomics is more than comfort. Handlebar height, sweep, and position change how much leverage you have over the front end and how much you can weight the pegs when the bike gets loose. The FastAce drop crown triple clamps, for example, allow up to 10mm of forward or rearward bar adjustment so you can tune cockpit feel without changing bars.
Build Order, Compatibility Checks and What to Ignore
Compatibility separates a build that runs from a pile of parts. Every part on this list has a fitment list, and the fitment list is the authority, not the product photo.
The build order and why each step sits where it does
| Step | Part | Why It Comes Here | Check Before You Buy |
|---|---|---|---|
| 1 | Controller | Sets the power ceiling for everything else | Motor tunes supported, harness included or not |
| 2 | Motor and battery | Must match controller voltage and current limits | Working voltage range, thermal limits |
| 3 | Brakes | Safety must match new speed | Rotor size, caliper bracket, fitment list |
| 4 | Suspension | Handles the new speed and weight | Rider weight spring rate, brake compatibility |
| 5 | Wheels and tires | Changes gearing and grip | Overall diameter, sprocket tooth count |
| 6 | Drivetrain and chassis | Supports the loads above | Chain length, shock pairing |
| 7 | Ergonomics | Fine-tunes control | Bar clamp spacing, riser height |
The compatibility matrix most guides skip
What you need is the short list of pairings that decide whether a build works, checked in this order:
- Controller to motor. Confirm the controller lists preloaded tunes for your motor, and confirm the motor's working voltage range sits inside the controller's range. A controller rated 48V to 93V paired with a motor rated 48-100V overlaps safely across the shared band; a motor whose range starts above the controller's ceiling will not reach its rated output.
- Controller to battery. Confirm the pack's continuous discharge current and voltage sit inside the controller's limits, and that the controller can read the pack's management system. A controller that cannot see the pack's limits will push past them or throttle early.
- Motor to chassis. Confirm the motor's mounting pattern and shaft interface match your frame before you buy. This is the check that most often forces a return.
Thermal management: the gap most build guides leave out
Performance builds generate heat, and heat limits how long you can stay on the throttle. Three numbers tell you whether a build will hold power: the controller's continuous rating versus its peak, the motor's thermal limit where it begins derating, and the pack's temperature ceiling. The Ventus 28 kW light e-moto motor, for example, lists a 130 deg C thermal limit where it begins limiting power and a full cut at 150 deg C.
Weight-to-power ratio: the math behind the parts list
Every part you add changes two numbers: power and weight. The build that feels fastest is not the one with the highest peak power; it is the one with the best power-to-weight ratio and the thermal headroom to use it. Write down your target peak power and ready-to-ride weight before you buy anything, then check each part against both. That is why wheels, rotors, and cockpit parts deserve the same scrutiny as the motor and controller.
Two things to ignore
First, ignore peak numbers printed without a continuous rating or a thermal limit; they tell you almost nothing about real riding. Second, ignore any claim that a part fits your bike without a model-and-year check against the fitment list.
Software that bypasses factory power or speed limits is a regulatory problem, not a performance shortcut. Organizations including PeopleForBikes guidance on tampering with speed and power limits have pushed back on exactly this practice. Build within the limits of where you ride.
That is also where a dealer earns its keep. RYVOX verifies fitment against your exact model and year before anything ships, and we are an authorized dealer for Arctic Leopard, Yozma, and Ventus, alongside brands like EBMX and Warp 9. If you are unsure whether a controller, fork, or wheel set suits your bike, RYVOX service and install information covers what we handle in-house.
One more note on regulatory compliance, since it shapes where you can ride. Trail access rules vary by land manager, and official guidance on where off-road vehicles are permitted is worth reading before you assume a trail is open to your build.
The pattern across every section is the same: the controller sets the ceiling, the motor and pack deliver within it, and brakes, suspension, wheels, and drivetrain make that power usable.
Frequently Asked Questions
Which upgrades improve electric dirt bike performance the most?
The controller is the highest-leverage change because it governs how much power the motor and battery can deliver. A programmable controller with field-oriented control smooths throttle response and lets you load battery profiles and motor tunes. After that, suspension and brakes matter most, since more power is only useful if the bike stays planted and stops. Wheels and drivetrain come next. Build in that order and each part supports the one before it.
Should you upgrade the battery or controller first?
Controller first, in most cases. A programmable controller such as the EBMX X-9000-V3 supports a working voltage of 48-100V and ships with over 15 plug-and-play battery profiles, so it can grow with a battery you add later. Buying a high-output battery before the controller usually means the pack is limited by stock electronics. Confirm your battery's voltage and connector type against the controller listing before ordering.
What should you check before ordering performance parts for an e-moto?
Check four things: exact model and year, motor and battery compatibility, brake and rotor sizing, and whether the part needs supporting hardware. A fork sized for a 220mm rotor will not work with a stock 200mm rotor, and an extended swingarm needs a longer chain and a shock with a higher spring rate. Ask the seller to confirm fitment against your specific bike before the order ships.
Do custom wheels change how an electric dirt bike handles?
Yes, noticeably. A 17-inch supermoto wheel set with a 2.15-inch front and 2.50-inch rear narrows the contact patch and lowers rotating mass compared with dirt wheels, which sharpens turn-in and changes gearing through the rear sprocket. Sprocket tooth count matters too: a larger rear sprocket trades top speed for acceleration. Expect a two to six week build time on laced-to-order wheels.
How do you prioritize upgrades for a custom electric dirt bike?
Work from the power source outward: controller, then motor and battery with thermal management, then suspension, brakes, and finally wheels and drivetrain. Each stage raises the load on the next, so a brake upgrade after a controller change is safer than the reverse. Skip cosmetic parts until the chassis and stopping power match the new output, and confirm fitment on every part before it ships.
Building a fast e-moto is easy. Building one that stops, turns, and holds together is the actual work, and it starts with getting the electrical foundation right before anything bolts on. RYVOX stocks genuine performance parts from EBMX, Warp 9, Ventus, ION, Dayco, and Sirris, and we confirm fitment against your exact model and year before your order leaves the shop. Text the shop with your bike's make, model, and year, and we will tell you what fits and what to skip.