
How to Install Sur Ron Supermoto Wheels (2026 Guide)
Learn how to install Sur Ron supermoto wheels with this step-by-step guide covering fitment, tools, torque specs, and safety checks.

Table of Contents
- Before You Start: Choosing the Right Supermoto Wheels
- Tools for Changing Sur-Ron Wheels
- Sur-Ron Light Bee Supermoto Wheel Installation: Step-by-Step
- Sur-Ron Ultra Bee Supermoto Conversion: What's Different
- Torque Specs, Chain Alignment, and Brake Checks
- Sur-Ron Wheel Installation Safety Checks Before Your First Ride
- Common Mistakes and Troubleshooting
- Conclusion
- Frequently Asked Questions
Last Updated: October 9, 2026
Before You Start: Choosing the Right Supermoto Wheels
The fastest way to ruin a supermoto build is buying wheels that don't fit.
Supermoto wheels are 17-inch street-oriented wheel sets that replace a dirt bike's stock 19-inch front and 18-inch rear wheels. Smaller rims with wider tires sharpen steering and put more rubber on the pavement.
Here's the thing most buyers miss: the Light Bee and the Ultra Bee use completely different hubs, spacers, and rotor sizes. A set that drops straight onto one will not touch the other.
Supermoto Wheel Kit Options for Sur-Ron Models
Two paths cover almost every Sur-Ron rider.
The Sur-Ron Light Bee X (LBX) 17" Supermoto Wheel Set is our widest-fitting option. It runs a 17×1.60 front and 17×2.15 rear, with tires mounted and balanced before it leaves the shop. It fits the Light Bee X, Light Bee S, E-Ride Pro, and Ventus One+ with LBX front hub spacers.
If you want a bigger rear, the Warp 9 17" Supermoto Wheel Set steps up to a 17×2.50 rear. It fits the Light Bee X, E-Ride Pro S, SS, and 2.0, Ventus One and One+, and the 79Bike Falcon.
| Option | Front / Rear Size | Rotor & Sprocket | Best For |
|---|---|---|---|
| LBX 17" Set | 17×1.60 / 17×2.15 | Reuse stock, or add kit | Budget builds, stock electronics |
| Warp 9 Set | 17×2.15 / 17×2.50 | Bare, or 220mm + sprocket | Bigger rear, brake upgrades |
Tools for Changing Sur-Ron Wheels
You need about a dozen tools, and the torque wrench is the one you cannot skip. Everything else you can borrow or buy cheap.

Here's the full list:
- 17mm and 19mm sockets for axle nuts
- Torque wrench rated to at least 60 Nm
- 4mm, 5mm, and 6mm hex keys for rotor and sprocket bolts
- Tire levers (three minimum) if you're mounting your own tires
- Bead buddy or a second set of hands
- Floor stand or center stand to lift the bike
- Chain breaker if you're changing sprocket size
- Brake cleaner and shop rags
- Threadlocker for rotor and sprocket bolts
- Tire pressure gauge
One insider note: a cheap torque wrench that reads 20% low will cost you an axle. Spend the money once.
Sur-Ron Light Bee Supermoto Wheel Installation: Step-by-Step
Budget 45 to 90 minutes for the swap if you've done it before. First-timers should plan on two hours.
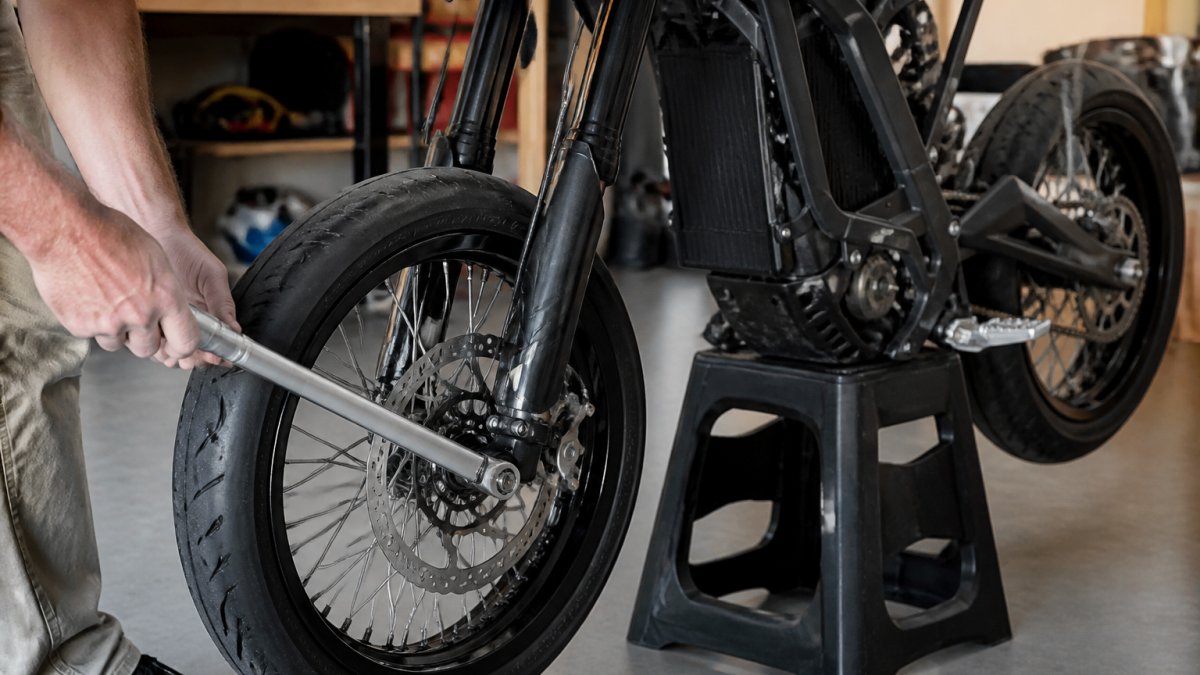
Removing the Stock Wheels
Start with the rear, because the chain gives you more room to work once the wheel is out.
- Put the bike on a stand so both wheels clear the ground.
- Loosen the rear axle nut before you lift the bike. It's easier with weight on the wheel.
- Remove the chain from the rear sprocket and let it hang on the swingarm.
- Pull the axle out, watching for spacers on both sides. Set them somewhere you won't lose them.
- Lift the rear wheel out and set it aside.
- Repeat on the front: loosen the axle pinch bolts, pull the axle, and slide the wheel free.
Keep every spacer and bolt in a labeled container. Mixing front and rear spacers is the most common first-timer mistake.
Installing the Front and Rear Supermoto Wheels
The install is the removal in reverse, with two additions: rotor and sprocket transfer, and torque.
- Transfer your stock rotor and sprocket to the new wheels, or mount the 220mm rotor and brackets if you bought that option.
- Slide the front wheel into the forks, insert the axle, and hand-tighten.
- Torque the front axle, then the pinch bolts.
- Fit the rear wheel into the swingarm, seat the spacers, and push the axle through.
- Route the chain over the rear sprocket and set tension.
- Torque the rear axle nut.
- Pump the front brake a few times to seat the pads.
If you'd rather not touch a torque wrench, our Supermoto Conversion Install service covers rotor and sprocket transfer, spacer and axle checks, chain alignment, brake bleed, and a road test.

Sur-Ron Ultra Bee Supermoto Conversion: What's Different
The Ultra Bee conversion is not just a bigger Light Bee swap. The rear tire jumps from a 90/80-17 to a 130/70-17, and the front goes from 70/90-17 to 100/80-17. Those wider tires change chain clearance and swingarm room.
Light Bee vs. Ultra Bee Fitment
The two platforms do not share a wheel set. The Light Bee and the Ultra Bee use different hubs, spacers and rotor sizes, and the Ultra Bee runs wider tires front and rear, so a set that drops onto one will not fit the other. Hub width and rotor bolt pattern are the two things that decide whether a set bolts on, which is why we go by the wheel-set page for your exact model and year rather than a generic chart. If your model isn't listed, send us a photo of the front hub and the sidewall of your current tire and we'll confirm fitment before you order.

What Changes in the Process
Two things change in the process:
- The rear sprocket offset is different, so chain alignment needs a fresh look, not a copy of your Light Bee settings. Set the rear axle, then sight the chain from behind before you torque anything.
- Wider rear tires can kiss the chain guard or swingarm on some setups. Check clearance with the bike on the ground, not on the stand, the swingarm moves through its travel and the gap shrinks.
Aim for at least 5 mm of clearance between the tire sidewall and the chain on both sides. If you're under that, you need a narrower rear tire or a sprocket offset adjustment, not a bigger hammer.
Tire Pressure and Road Setup
Supermoto tires run higher pressure than dirt tires. Start around 28-32 psi for street use and adjust from there.
After the first 50 miles, re-check axle torque, chain tension, and tire pressure. New tires seat and stretch, and fasteners settle. Re-torque the axles and re-check chain slack before your next ride.
The Supermoto Performance Tire, 17 inch comes in both sizing groups, so you can match Ultra Bee spec exactly. Send us a photo of your sidewall if you're unsure which set you need.
Sur-Ron Light Bee X (LBX) 17" Supermoto Wheel Set →
Torque Specs, Chain Alignment, and Brake Checks
Torque specs are where most DIY installs go wrong, and Sur-Ron doesn't print them on the swingarm. Use a torque wrench on every axle and brake fastener, and re-check after your first ride.
Torque Reference
We don't publish one torque table for every Sur-Ron. The right values differ by model, model year, axle and wheel set, and a figure that is correct for one bike can strip a pinch bolt or leave an axle loose on another. Use the torque values in your bike's service manual and in the instructions supplied with your wheel set. Tighten rotor and sprocket bolts in a star pattern in two passes, half torque then full torque, so the disc or sprocket seats flat instead of cocking to one side, and re-check both axle nuts after your first ride. Not sure of a value for your exact bike? Text the shop and we'll give it to you.
Chain Alignment
Sight down the chain from behind the bike. It should run straight from the front sprocket to the rear. A misaligned chain wears the sprocket teeth and can throw the chain under load.
For a real check, measure from the swingarm pivot to the rear axle center on both sides. The two numbers should match within about 1-2 mm.
Chain tension on a Sur-Ron is looser than most riders expect.
Brake Checks
After the wheel is torqued, pump the front lever five to ten times until it feels firm. The pistons retract slightly when you pull the wheel, and the first squeeze after a swap often goes to the bar.
Spin the wheel and listen. A light, even hiss from the pads is normal.
If the lever still feels spongy after pumping, you introduced air when the caliper moved. Bleed the system before you ride.
Sur-Ron Wheel Installation Safety Checks Before Your First Ride
Do these seven checks before you ride anywhere. They take five minutes and catch the mistakes that hurt.
- Both axles torqued to spec with a torque wrench
- All spacers seated in the correct position
- Front and rear wheels spin freely with no drag
- Brake pads contact the rotor evenly, lever feels firm
- Chain tension within spec, alignment straight
- Tire pressure set to your riding target
- Every bolt you touched is tight
If anything feels off, stop. A wheel that wobbles on the stand will wobble worse at speed.
Common Mistakes and Troubleshooting
Wheel won't center in the forks. A spacer is on the wrong side or missing.
Chain rubs or jumps. Alignment is off, or the sprocket size changed without adjusting chain length. Re-check the sight line.
Brake lever feels spongy. The caliper pistons need to re-seat after the wheel swap. Pump the lever several times.
Rotor drags on the pads. The rotor isn't seated flat, or a bolt is proud. Loosen, reseat, and re-torque.
Riding with a dragging brake or a loose axle can warp a rotor or seize a wheel bearing. Fix it in the garage, not on the trail.
Conclusion
Getting supermoto wheels onto a Sur-Ron is a straightforward job, but it rewards patience over speed. The riders who run into trouble are the ones who skip the torque wrench, guess at fitment, or forget to re-check the chain after the swap.
At RYVOX, we take the guesswork out of the whole process. We verify fitment against your exact model and year before shipping, stock only genuine parts we run on our own bikes, and offer in-house install with a road test before you ride home.
Frequently Asked Questions
Do Supermoto wheels need tubes?
Most 17-inch supermoto wheel sets for Sur-Ron models come set up for tubeless tires, but it depends on the specific rim. The tires on RYVOX wheel sets arrive mounted and balanced, so you do not need to source tubes separately for those. If you are mounting your own tires, check whether your rim is tubeless-rated before deciding. Running a tube in a tubeless rim works but adds weight and heat at sustained street speeds.
What tools do you need to swap Sur-Ron wheels?
You need a socket set covering the axle nut sizes, a torque wrench, Allen keys for brake caliper and rotor bolts, tire levers if you are mounting tires yourself, and a bike stand or lift. A chain breaker helps if you are changing sprocket sizes. RYVOX offers a Supermoto Conversion Install service for $250 that handles rotor and sprocket transfer, spacer and axle checks, chain alignment, brake bleed, and a road test.
What should you check after installing Sur-Ron supermoto wheels?
After installation, check that the axle nuts are torqued to spec, the chain has correct tension and alignment, and the brake caliper is centered on the rotor with no drag. Spin each wheel to confirm it rotates freely. Pump the brake lever to seat the pads before riding. Do a slow test ride in a safe area and recheck all fasteners after the first few miles, since new installations can settle.
How do you choose the correct supermoto wheel kit for a Sur-Ron?
Match the kit to your exact model and year. The Sur-Ron Light Bee X and LBX use a 17x1.60 front and 17x2.15 rear in the RYVOX set, while the Ultra Bee runs wider sizes. Hub designs differ between Sur-Ron and Talaria even when rim sizes look the same, so they are not interchangeable. RYVOX verifies fitment against your model and year before shipping to prevent wrong orders.