
Essential E-Moto Cockpit Upgrades for Better Ergonomics
Improve e-moto ergonomics with handlebar risers, grips, and control upgrades. Reduce strain and boost comfort on longer rides with tested components.

Table of Contents
- Why Cockpit Fit Matters for E-Moto Comfort
- Electric Dirt Bike Handlebars: Finding Your Reach and Rise
- E-Moto Handlebar Risers and Bar Mounts: Adjusting Your Cockpit
- Electric Dirt Bike Grips: Reducing Hand Fatigue and Improving Control
- E-Moto Adjustable Levers and Control Placement
- Display Mounts and Handguards: Protecting Your Setup
- Fitting Cockpit Upgrades to Your Model and Riding Style
- Conclusion
- Frequently Asked Questions
Last Updated: October 17, 2026
Why Cockpit Fit Matters for E-Moto Comfort
A poorly fitted cockpit forces your wrists, neck, and back into unnatural angles, compounding into fatigue, reduced control, and pain. Most discomfort comes from fixable issues.
Matching your cockpit to your reach, hand size, and riding position delivers immediate gains in comfort and control.
Handlebars set your reach and arm angle, grips control how your hands sit and absorb fatigue, and lever placement decides whether you stretch or cramp to brake.
Electric Dirt Bike Handlebars: Finding Your Reach and Rise
The handlebar controls your reach, arm angle, and how much weight your upper body carries. Too far forward stretches your arms; too close cramps your shoulders.
Handlebar Sweep and Positioning
Sweep, the angle the bar bends back toward you, affects how your wrists sit. Back-sweep, like on the Warp 9 E-Moto 31.8mm Handlebars, brings the grips closer and angles your wrists more neutrally.

The Warp 9 bar features 9 degrees of back-sweep and 5 degrees of upsweep.

If your stock setup feels stretched, a bar mount can help. The Warp 9 Bar Mount shifts bars 10mm forward from stock, closing the reach gap without changing the bar itself.
Rise Options for Standing and Seated Riding
Rise is how tall the bar sits relative to your seat. More rise keeps your arms higher and torso upright; less rise drops you forward.
Standing riders often prefer taller bars for a powerful arm position; seated riders sometimes prefer less rise to move weight back over the rear wheel.
The Warp 9 E-Moto Tapped Handlebar comes in two rise options: 80mm (3 inches) or 40mm (1.5 inches).

E-Moto Handlebar Risers and Bar Mounts: Adjusting Your Cockpit
A bar mount gives you fine control over reach and rise without swapping the handlebar.
Bar mounts replace the OEM stem and move the bar forward, backward, up, or down. The Warp 9 Bar Mount moves bars 10mm forward and includes a spacer to add 20mm of height.
The Warp 9 Altis Sigma Direct Bar Mount is engineered for the Altis Sigma geometry.
Measure from your seat to where your hands naturally fall; if you're stretching or cramping, a mount can bridge that gap.
Electric Dirt Bike Grips: Reducing Hand Fatigue and Improving Control
Grip material, diameter, and texture affect hand fatigue and control feedback.
Thicker grips can spread pressure over more surface area; thinner grips can give more feedback. Waffle patterns can improve traction.
The ODI Ruffian Full-Waffle MX Grips feature a larger diameter and 360-degree waffle pattern.
The ODI Ruffian No-Waffle MX Grips offer a thin profile with a diamondized surface pattern.
E-Moto Adjustable Levers and Control Placement
A lever too far out forces you to reach with your fingertips and roll your wrist; one too close crowds your hand and makes modulation harder.
Set Lever Angle Before You Set Lever Reach
Most riders adjust reach first and angle second. Do it the other way around. Lever angle determines whether your wrist stays neutral when you pull; reach only determines how far your fingers travel.
A practical method:
- Sit or stand on the bike in your normal riding position with gloves on.
- Loosen the perch clamp bolt just enough that the perch rotates with firm hand pressure.
- Rest two fingers on the lever blade. Rotate the perch until the blade meets your fingers in a straight line from forearm through wrist to knuckle.
- Tighten the perch and re-check from the standing attack position, not just seated. Standing changes your wrist angle more than any other variable.
- Repeat for the throttle side so both hands sit at the same wrist angle.
Set Reach to Your Hand, Not the Other Way Around
Once angle is set, dial reach so the blade sits where your index and middle fingers land with a slight bend at the first knuckle.
Warp 9 E-Moto 31.8mm Handlebars →
Throttle, Switches, and Cable Routing
After any bar, mount, or lever change, walk through the full control stack:
- Throttle position. The throttle should sit where your thumb and wrist can operate it without shifting your grip. If the throttle body crowds the brake perch, you will rotate your hand outward to compensate, which loads the outside of your wrist.
- Switch visibility. Kill switch, mode switch, and any display buttons should be reachable with your thumb without looking down for more than a glance. If a switch now sits behind a handguard or under a lever, reposition it before you ride.
- Cable and harness routing. Adding rise, moving bars forward, or rotating perches changes cable paths. Check that brake lines, throttle wiring, and display harnesses are not kinked, pinched at the steering stop, or pulled taut at full lock.
Symptom-to-Cause Troubleshooting
Use discomfort as a diagnostic, not just an annoyance:
| Symptom | Likely cockpit cause | First adjustment to try |
|---|---|---|
| Numb or tingling hands | Grips too thin or too hard; wrists bent back | Thicker or softer grip; rotate lever perch to straighten wrist |
| Pain at base of thumb | Lever reach too far; throttle crowding the perch | Bring lever reach in; separate throttle and brake perch |
| Outside-wrist pain | Bars too wide or sweep too flat for your shoulder width | Check bar width and sweep; consider a bar with more back-sweep |
| Shoulder tension | Bars too far forward or too low for standing position | Add rise or move bars back with a mount |
| Lower-back strain | Bars too high for seated riding, pulling torso upright and loading the lumbar spine | Reduce rise or move bars forward |
| One hand fatigues faster | Asymmetric lever angle or grip position | Match lever angle and grip position side to side |
Display Mounts and Handguards: Protecting Your Setup
A display mount positions the screen where you can see it and can protect it from impacts and debris.
The Warp 9 E-Ride Pro Display is a billet aluminum mount designed for the E-Ride Pro lineup.
For Ventus riders, the Ventus Handlebar is the OEM bar, and the Ventus Display is the genuine OEM display.
Handguards protect your hands and levers from branches, rocks, and impacts. The Warp 9 E-Moto Handguards use CNC-machined aluminum mounts and injection-molded composite shields.
The mounts drop below brake and switch gear for clearance, and you can rotate the bracket to position the shield.
Fitting Cockpit Upgrades to Your Model and Riding Style
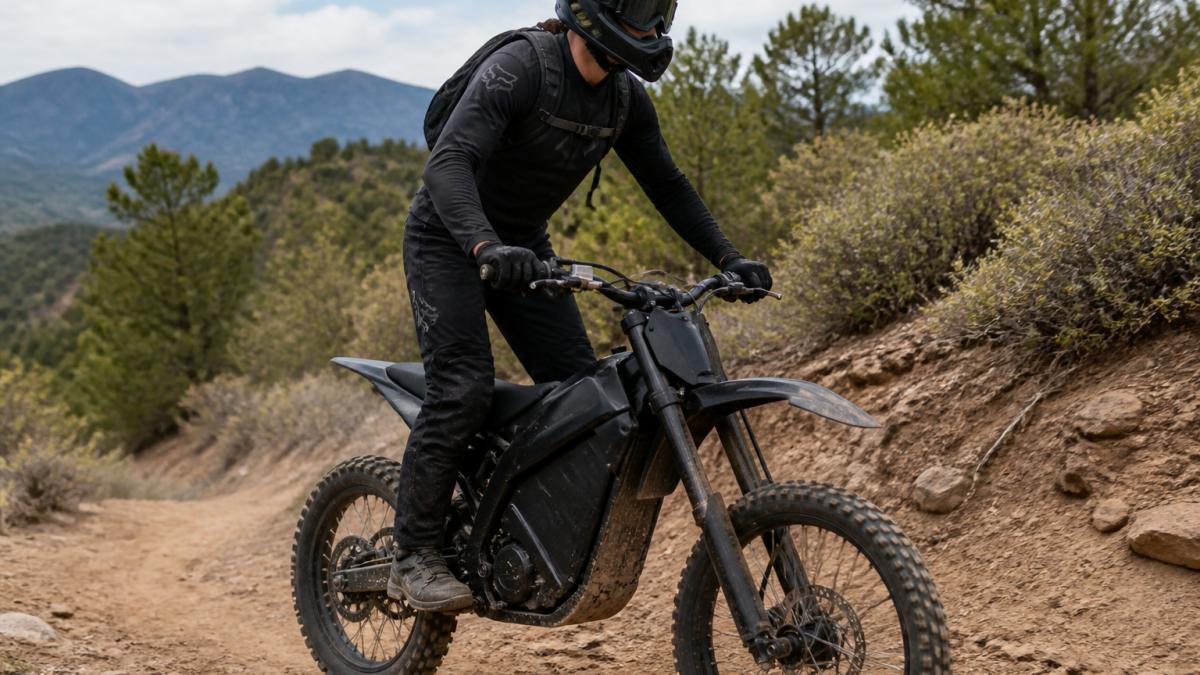
Fitment is where some cockpit upgrades fail: the part does not fit the bike, or it fits the bike but not the rider.
Step 1: Confirm Component Compatibility
Before any ergonomic decision, confirm the part will mount to your bike. The four compatibility checks that matter most:
- Clamp diameter. Bars and mounts must match the clamp on your bike. A 31.8mm bar clamp is common on many e-moto models, but not universal. A 28.6mm clamp needs a different bar. Measure or look up your clamp size before ordering a bar.
- Bar clamp area and control zone. Fat bars taper, and the straight section where grips, perches, and switches mount has a fixed length.
- Rise and sweep geometry. Two bars with the same clamp diameter can put your hands in very different places. Compare rise, back-sweep, and up-sweep numbers, not just the label.
For model-specific fitment, check the product page. The Warp 9 E-Moto 31.8mm Handlebars list the models they fit on the product page, and the Warp 9 Altis Sigma Direct Bar Mount is engineered for the Altis Sigma geometry. If your model is not listed on a product page, do not assume it fits.
Step 2: Measure Your Current Cockpit
Three measurements give you a baseline:
- Seat-to-grip drop. With the bike on a stand or against a wall, measure vertically from the top of the seat to the center of the grip. This is your standing reference.
- Grip-to-grip width. Measure center to center across the grips. This tells you whether the bar is wider or narrower than your natural shoulder width.
- Reach at full lock. Sit in your normal riding position and note where your hands land relative to your shoulders.
Write these numbers down. Every upgrade should move at least one of them in a direction you chose on purpose.
Step 3: Match the Setup to Your Riding Style
Cockpit fit is a target per riding style, and most riders split their time across more than one.
- Standing off-road and technical trail. Prioritize a tall, slightly rearward bar position that keeps your torso upright and your elbows bent. Taller rise and more back-sweep usually help.
- Seated trail and longer rides. Prioritize a bar position that lets you sit with a slight forward lean and relaxed shoulders.
- Mixed riding. Set the cockpit for the style you ride most, then check that the other style is still tolerable.
Step 4: Match the Setup to Your Body
Body dimensions shift the target more than most riders expect:
- Taller riders and longer arms typically need more rise and sometimes more back-sweep to avoid rounding the upper back to reach the bar.
- Shorter riders and shorter arms typically need less rise and a bar or mount that brings the grips closer, so they are not reaching forward with locked elbows.
- Broader shoulders often feel better on a wider bar; narrower shoulders on a narrower bar. Bar width is adjustable within limits by cutting, but confirm the control zone still fits your perches and guards before cutting.
Step 5: Verify Before You Ride
After installation, run the same checks a shop would:
- Full steering lock both directions with no contact between controls, guards, and the frame.
- Brake lever free play within the system's specification.
- Throttle returns freely and does not bind against the grip or perch.
| Component | Compatibility check | Fit check |
|---|---|---|
| Handlebar | Clamp diameter, control zone length | Rise, sweep, width vs. your measurements |
| Bar mount | Steer tube and clamp interface | Forward/back and height change vs. your reach |
| Grips | Bar diameter at grip area | Diameter and texture vs. hand size and terrain |
| Levers | Perch clamp diameter, cable/hydraulic interface | Angle and reach vs. hand size |
| Display mount | Display model and mounting pattern | Visibility and angle from riding position |
| Handguards | Bar clamp area and control clearance | Clearance at full lock with gloves on |
Conclusion
Your e-moto cockpit directly affects how your body feels and how well you control the bike. The right e-moto cockpit upgrades, proper handlebars, grips, mounts, and control positioning, can reduce strain and improve ride quality.
Start with fitment. Know your bike model and year, measure your reach and body dimensions, then choose components that match your riding style and body type.
RYVOX stocks genuine Warp 9 bars, mounts, handguards, and displays, plus ODI grips and OEM components for Ventus bikes. Text the shop if you're not sure what fits your bike, or visit ryvox.com to browse the full cockpit lineup.
Frequently Asked Questions
What cockpit upgrades can make an e-moto more comfortable on longer rides?
Handlebar height adjustments, grip upgrades, and proper control positioning can reduce strain on your hands, wrists, and back. Handguards protect your hands from branches and impacts. Display mounts positioned lower and forward can improve visibility. Together, these upgrades can let you ride longer. Start with grips and handlebar rise, then add a bar mount if your reach feels off.
How do I know which electric dirt bike handlebars and risers fit my specific model and year?
Check your bike's manual or contact RYVOX directly with your model and year. Many bars use a 31.8mm clamp diameter, but some models use different sizes or require specific mounts. RYVOX verifies fitment before shipping any part. Never assume compatibility based on another rider's setup, as even similar-looking bikes can have different clamp diameters or mount points.
Which grips help reduce hand fatigue on an electric dirt bike?
Grips with a comfortable diameter and traction pattern matter most. Larger-diameter grips can suit riders with bigger hands. Thinner grips can work better for smaller hands. Material compounds affect comfort too. ODI grips are engineered for durability and control, with options in both full-waffle and thin profiles to match your hand size and riding style.
Should I upgrade my e-moto handlebars if my current setup feels uncomfortable?
Yes, if you experience wrist, neck, or back strain after rides. Handlebar sweep, rise, and width directly affect posture. A bar with back-sweep pulls your hands closer to your body. Higher rise moves handlebars upward. If your current bars feel too flat or too far forward, upgrading to a swept-back bar with more rise can make a significant difference in comfort and control.