
Electric Dirt Bike Pre Delivery Inspection: 2026 Guide
Electric dirt bike pre delivery inspection guide: check torque specs, battery voltage, brakes, and wiring before you ride. Get the full PDI checklist now.

Table of Contents
- What a Pre Delivery Inspection Covers on an Electric Dirt Bike
- Essential Tools for E-Moto Maintenance and PDI
- Step-by-Step Electric Dirt Bike Assembly Guide
- E-Moto Bolt Check Torque Specs and Fastener Security
- Electrical, Battery, and Brake Checks in Your PDI Checklist
- Post-PDI Maintenance Schedule and Warranty Registration
- Troubleshooting Common Out-of-Box Failures
- Frequently Asked Questions
Last Updated: September 14, 2026
What a Pre Delivery Inspection Covers on an Electric Dirt Bike
An electric dirt bike pre delivery inspection is the documented, step-by-step verification a dealer performs on a new or crate-shipped e-moto before the customer takes possession. It confirms the bike was assembled correctly, every fastener is torqued to spec, and the electrical system, battery, and brakes function as designed. Skipping it is how you discover a loose axle bolt at 30 mph instead of in your garage.
At RYVOX, we run PDI on every complete bike that leaves the shop. The NHTSA guidance on vehicle safety defects exists precisely because assembly errors and component failures are real, reportable risks, not hypothetical ones. Below, we break down the full checklist, the tools you need, and the out-of-box failures we see most often.
How Electric PDI Differs From Gas Bike Setup
Gas-bike setup centers on fluids, carburetion, and kick-start verification. An electric PDI replaces most of that with voltage checks, harness inspection, and firmware verification: no oil to fill, but a battery management system, controller, throttle map, and kill switch to confirm before the first ride. The mechanical side overlaps more than people expect, torque specs, spoke tension, and brake bedding still matter.
The biggest difference is diagnostic. A gas bike that won't start gives clues through sound and smell; an e-moto that won't power up could be a connector, a fuse, a BMS fault, or a dead controller, and you need a multimeter to tell them apart.
Essential Tools for E-Moto Maintenance and PDI
The essential tools for e-moto maintenance and PDI fit in a single rolling cart, but two decide whether your inspection is trustworthy: a calibrated torque wrench and a digital multimeter.
Here's the working kit:
- Torque wrench, 5-50 Nm range, for axle nuts, triple clamps, and brake caliper bolts
- Digital multimeter for pack voltage, continuity, and harness diagnostics
- Spoke wrench sized to your rim's nipple
- Tire pressure gauge, digital preferred for repeatability
- Metric hex and socket set, 3mm through 17mm
- Thread locker (medium strength) for fasteners that see vibration
- Cable tension gauge or a firm hand for control cable adjustment
- Zip ties and dielectric grease for harness routing and connector protection
Step-by-Step Electric Dirt Bike Assembly Guide
Follow this electric dirt bike assembly guide in order, skipping ahead means redoing work.
- Uncrate and inventory. Match every part against the packing list before you touch a tool. Missing hardware is common on crate-shipped bikes.
- Mount the front wheel. Install the axle, torque it, and spin the wheel to check for rotor rub.
- Install handlebars and controls. Route the throttle, brake levers, and kill switch without pinching the harness.
- Connect the main harness. Confirm every connector seats fully and locks. Check the UL 2849 standard for e-bike electrical systems if you want to understand what a compliant harness design looks like.
- Install the battery pack. Verify the mount is secure and the charging port is unobstructed.
- Set tire pressure and check spoke tension. Tap each spoke; a dull thud means a loose one.
- Power up and verify the display. Confirm no fault codes before the first ride.
- Bed the brakes. Roll slowly and apply progressive pressure to seat the pads.
Expected result: A bike that powers on cleanly, rolls without drag, and stops predictably.
E-Moto Bolt Check Torque Specs and Fastener Security
E-moto bolt check torque specs come from your owner's manual and are model-specific. There is no universal "axle nut" number across brands, and guessing is how threads strip or fasteners back out. Pull the manual and set your wrench to the listed value.
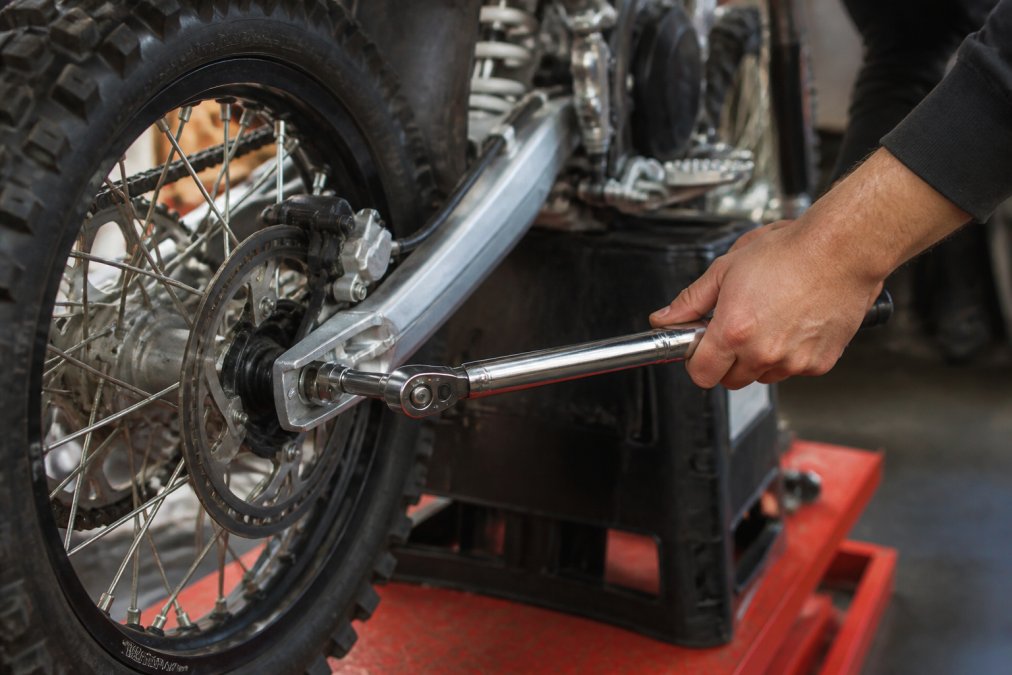
If the spec is unclear, contact the manufacturer or an authorized dealer rather than defaulting to a generic value. Torque is a safety specification, not a suggestion.
Which Fasteners Loosen Most on Crate-Shipped Bikes
Axle nuts, triple clamp bolts, and brake caliper bolts top the list. Crate shipping subjects a bike to hours of vibration, and anything not thread-locked from the factory can shift. Motor mount bolts on higher-torque e-motos also work loose over the first few rides. Re-check all four after your first two hours, then at the intervals in your manual.
Electrical, Battery, and Brake Checks in Your PDI Checklist
The electrical, battery, and brake checks in your PDI checklist decide whether the bike is safe to ride, not just whether it turns on. Work them in order so one fault doesn't mask the next.
1. Pack voltage at the charging port. Set your multimeter to DC volts, probe the charge port terminals, and compare to the nominal pack voltage in your manual. A 60V-class pack typically reads in the low-to-mid 60s when fully charged; a 72V-class pack reads in the high 70s to low 80s (Battery University). More than a few volts below nominal means the pack is deeply discharged or has a cell group out of balance, do not charge or ride it. Contact the dealer.
2. BMS and contactor behavior. Power the bike on and listen for the main contactor click. Most e-motos close the contactor only after confirming pack voltage, temperature, and cell balance are in range. No click, no display, or a flashing fault code means the BMS is refusing to close, a diagnostic signal, not a dead battery. Note the code and check the manual's fault table.
3. Harness walk-through. Trace the main harness from the battery bay to the controller, then to the display, throttle, and brake levers. Look for chafed insulation at the steering head, unseated connectors, and pinched routing under the seat or tank cover. Every connector should seat fully and lock; one that pulls apart with light tug is a future intermittent cutout.
4. Kill switch and brake cut-off. Test the kill switch first, it should cut motor power instantly with the throttle held. Then test each brake lever: squeezing either should cut motor power before the pads fully bite. On regen-equipped bikes this also triggers regen. If the motor keeps pulling with a lever squeezed, the cut-off switch or its connector is the fault, not the brake.
5. Throttle return. With the bike powered off, twist the throttle and release. It must snap back to zero on its own, every time, with no sticking. A throttle that hangs is a runaway risk and fails PDI outright.
6. Brake mechanicals. Squeeze each lever and confirm the pads contact the rotor squarely with no drag when released. Check brake fluid level at the master cylinder and look for weeping at the caliper and banjo bolt. Spin the wheel, a wobbling rotor or rubbing caliper means the wheel needs re-seating or the rotor is bent.
7. Regen check (if equipped). Roll the bike forward with the system on and a brake lever lightly squeezed. You should feel resistance build as regen engages. No resistance means the regen circuit or the brake cut-off signal isn't reaching the controller.
For riders chasing more from the electronics, a Controller Diagnosis & Tune reads fault codes and confirms the harness and connectors are sound before you start swapping parts. If you find a damaged harness, an OEM main wiring harness for the Surron Ultra Bee is a direct-fit replacement, and the OEM wheel speed sensor is worth checking if your speedometer reads erratically after assembly.


| Check | What to Verify | If It Fails |
|---|---|---|
| Pack voltage | Within a few volts of nominal for your pack class | Do not charge or ride; contact dealer |
| BMS / contactor | Audible click, no fault code on display | Note code, check manual fault table |
| Harness | No chafe, all connectors seated and locked | Repair or replace harness |
| Kill switch | Cuts motor power instantly | Replace switch before riding |
| Brake cut-off | Cuts motor power before pads bite | Inspect lever switch and connector |
| Throttle | Returns to zero unaided | Adjust cable or replace throttle |
| Brakes | Firm lever, no rotor drag | Bleed or adjust caliper |
| Regen | Resistance builds on light lever squeeze | Check regen circuit and cut-off signal |
Post-PDI Maintenance Schedule and Warranty Registration
Most PDI guides stop at delivery. The first 50 miles decide whether your inspection held, and the paperwork you file in the first week decides whether a defect claim gets paid.
Warranty Registration: Do It the Day You Take Delivery
Warranty registration should happen the day you take delivery, not weeks later. Most manufacturers tie coverage to a registration window, and missing it can void a claim even when the failure is clearly a defect. Photograph the VIN plate and odometer, then register through the manufacturer's portal or your dealer.
Keep a PDI file with these items:
- Signed PDI checklist with the date, the inspector's name, and the torque values actually used
- VIN photo and odometer photo at delivery
- Registration confirmation (email or portal screenshot)
- Receipts for any parts or service, especially if you did the assembly yourself
- Photos of any pre-existing cosmetic damage taken before the first ride
That file is what a warranty administrator asks for when a controller or BMS fails at 200 miles.
What Voids an E-Moto Warranty
Common warranty-voiding triggers on electric dirt bikes include:
- Opening the battery pack or BMS enclosure. Sealed packs are sealed for a reason; breaking the seal usually ends coverage on the pack.
- Controller firmware flashing outside the manufacturer's approved updates. A flashed controller that fails is rarely covered.
- Water intrusion from pressure-washing or submerging a pack rated only for splashes.
- Unauthorized repairs that alter the harness or bypass a safety cut-off.
- Missing the first service interval listed in the manual.
If you plan to modify the bike, do it after the warranty period or accept that the affected system is on your dime.
First 50 Miles: The Maintenance Schedule Most Guides Skip
The post-PDI maintenance schedule matters as much as the inspection itself. Fasteners torqued correctly at PDI can still settle under the first real load, and spoke tension drops as the wheel seats.
After the first ride (roughly 1-2 hours):
- Re-torque axle nuts, triple clamp bolts, and brake caliper bolts to the manual's specs
- Re-check spoke tension, tap each spoke; a dull thud means a loose one
- Check brake lever feel and pad contact; re-bed if the lever went soft
- Inspect the harness at the steering head for chafe from the first steering cycle
At 50 miles:
- Re-torque motor mount bolts (these work loose fastest on high-torque e-motos)
- Check tire pressure cold and adjust to the manual's spec
- Inspect brake pads for uneven wear and the rotor for scoring
- Check chain tension and lubrication if your bike runs a chain final drive
- Confirm no new fault codes on the display
At the manufacturer's first service interval (often 100-300 miles, check your manual):
- Full fastener torque pass
- Brake fluid condition check
- Battery pack balance check via the BMS or dealer tool
- Suspension sag and rebound check
Battery Care Between Rides
Battery care is its own routine: store the pack at a moderate charge level (most manufacturers recommend roughly 50-60% for long-term storage), avoid leaving it fully depleted for more than a few days, and never charge a pack that's been damaged, submerged, or dropped. Charge in a dry area away from flammable material, unplug once the charger indicates full, and take any pack that swells, smells sweet, or gets unusually hot out of service immediately.
Troubleshooting Common Out-of-Box Failures
Troubleshooting common out-of-box failures starts with the simplest explanation. A bike that won't power on usually has a kill switch engaged, a battery not fully seated, or a blown fuse, not a dead controller.
Work through this order:
- No power at all. Check the kill switch, then the battery connector, then the main fuse.
- Powers on, no throttle response. Inspect the throttle connector and confirm the kickstand or brake cut-off isn't engaged.
- Intermittent cutouts. Look for a loose harness connector or a chafed wire near the steering head.
- Speedometer reads wrong. Check the wheel speed sensor and its gap to the rotor.
- Grinding or drag when rolling. Confirm the brake rotor isn't bent and the axle is properly seated.
If you've checked all five and the fault remains, it's time for a proper diagnostic rather than parts-swapping. Guessing gets expensive fast on electric drivetrains.
RYVOX handles in-house PDI and professional assembly for riders who want the bike verified before the first ride, stocks genuine parts from brands like EBMX, Warp 9, and Arctic Leopard with fitment checked against your exact model and year, and stands behind every component with valid warranty support. Get started with RYVOX and take delivery of a bike that's ready to ride, not ready to troubleshoot.
Frequently Asked Questions
What does a pre delivery inspection include for electric dirt bikes?
A pre delivery inspection covers cosmetic damage, fluid levels, battery voltage and charging, tire pressure, brake function, electrical harness connections, lighting, fastener torque, and VIN verification. On electric models you also check throttle response, kill switch operation, and controller fault codes. RYVOX performs this in-house before any bike ships, and a documented PDI protects your warranty if something fails early.
What tools are required for a standard electric dirt bike PDI?
You need a torque wrench, metric socket set, hex and Torx keys, tire pressure gauge, multimeter, thread locker, and a stand. A spoke wrench helps if you ride off-road. For e-moto bolt check torque specs, always use the owner manual values rather than guessing. RYVOX stocks genuine replacement hardware and electrical parts if a PDI turns up a stripped bolt or damaged connector.
How often should I perform maintenance checks after the initial PDI?
Re-torque critical fasteners after the first 50 miles, then every 250 miles or before each ride for axle and brake bolts. Check tire pressure weekly, inspect brake pads monthly, and test battery voltage every few weeks. Chain tension and spoke tension need attention after every off-road session. Following this schedule after your pre delivery inspection keeps the bike safe and preserves warranty coverage.
What should I do if my new electric dirt bike fails right out of the box?
Document the failure with photos and video, then contact the seller before riding. Common out-of-box issues include loose battery connectors, misadjusted control cables, and controller faults. Do not attempt repairs that void warranty. RYVOX offers a Controller Diagnosis & Tune service for $125 that includes fault reading, harness inspection, and a written verdict, and the fee comes off a replacement controller if yours is dead.