
Electric Dirt Bike Motor Troubleshooting Guide
Diagnose electric dirt bike motor problems with this step-by-step troubleshooting guide. Test Hall sensors, read error codes, and fix cutouts fast.

Table of Contents
- What You'll Need: Tools for Motor Diagnostics
- Step 1: Check the Easy Stuff First (Kickstand, Brake Cutoff, Connections)
- Step 2: Test Your Battery and Look for Voltage Drop
- Step 3: How to Test Electric Dirt Bike Motor Hall Sensors
- Step 4: Read and Interpret Electric Dirt Bike Error Codes
- Step 5: Inspect the Controller, Wiring Harness, and Phase Wires
- Common Electric Dirt Bike Motor Cutout Causes and Motor Stuttering Explained
- Frequently Asked Questions
Last Updated: October 2, 2026
What You'll Need: Tools for Motor Diagnostics
An electric dirt bike motor troubleshooting guide is only as good as the tools behind it, and motor troubleshooting starts with the right gear. You can guess at a cutout all day, but a $25 multimeter will tell you the truth in five minutes.
Gather these before you touch the bike:
- Digital multimeter with continuity and DC voltage settings
- Basic hand tools for removing the seat, side panels, and battery cover
- Contact cleaner for corroded connectors
- Zip ties and electrical tape for temporary repairs
- Your bike's error code chart (usually in the manual or online)
Step 1: Check the Easy Stuff First (Kickstand, Brake Cutoff, Connections)
The most common electric dirt bike motor cutout causes are also the most boring ones. A sticky kickstand sensor or a half-seated brake cutoff switch will kill power just like a dead motor.
Start here:
- Kickstand safety switch - lift the stand fully and check for a click
- Brake cutoff switch - squeeze each lever and listen for the microswitch
- Battery connectors - unplug, inspect, and reseat every main plug
- Throttle connector - check the plug behind the bars for looseness
Step 2: Test Your Battery and Look for Voltage Drop
A tired battery pack can mimic a failed motor. This is the single biggest misdiagnosis we see.
- A healthy pack holds close to its rated voltage
- A sagging pack drops hard under load
- A voltage drop over 3-4 volts points to weak cells or a bad BMS
Step 3: How to Test Electric Dirt Bike Motor Hall Sensors
Hall sensor testing is the step most riders skip, and it is where the real answers hide. Hall sensors tell the controller where the motor rotor is at every moment. When one fails, the motor stutters, jerks, cogs, or cuts out completely, and because the symptom looks mechanical, riders replace motors that were never broken.
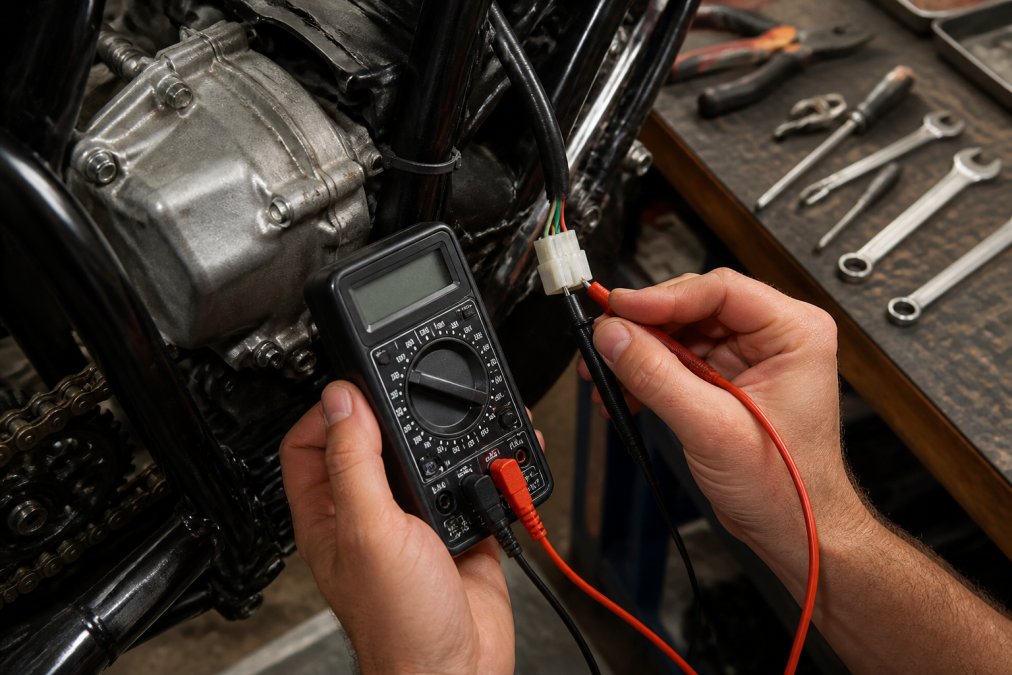
Identify Your Hall Connector First
Most hub and mid-drive motors use a 5-pin or 6-pin Hall connector at the motor. The standard layout is:
- Pin 1, Red, +5 V supply from the controller
- Pin 2, Black, ground
- Pins 3, 4, 5, Yellow, Green, Blue signal wires (one per Hall sensor)
- Pin 6 (if present), often a speed or temperature signal, not a Hall output
The Multimeter Procedure
You need a digital multimeter set to DC volts, a thin back-probe (sewing needle or dedicated probe), and a way to spin the wheel with the motor off the ground.
- Key on, throttle off. Power the controller so the +5 V rail is live, but do not apply throttle.
- Confirm the supply. Back-probe Pin 1 to Pin 2. You should read close to 5 V DC. If you read 0 V, the controller is not supplying the Hall rail, stop and diagnose the controller, not the sensors.
- Back-probe each signal pin to ground. Hold the black probe on Pin 2 and touch the red probe to Pin 3, then 4, then 5.
- Rotate the wheel slowly by hand. Each signal pin should toggle between roughly 0 V and 5 V as the rotor passes a magnet. You are looking for a clean square-wave switch, not a steady number.
- Record each pin. A pin that sits flat at 0 V, flat at 5 V, or floats with no reading is a failed sensor or a broken signal wire.
Reading the Results
- All three pins toggle, Hall sensors are healthy. Move on to the phase wires and controller.
- One pin flat, that sensor or its signal wire failed. This is the classic cause of stutter and cogging.
- All three flat, but 5 V supply is present, suspect a shared ground or a failed Hall board.
- No 5 V supply, the controller's Hall rail is dead. The sensors are innocent.
Continuity Check on the Signal Wires
If a pin reads flat, unplug the connector at both ends and set the meter to continuity. Touch one probe to the motor-side pin and the other to the controller-side pin of the same color. No beep means the wire is broken inside the harness, a common failure where the cable flexes at the axle or steering head. Repair the wire before condemning the sensor.
Replacement Rules
If the Hall test passes and the motor still stutters, the fault is downstream, phase wires, controller, or throttle signal. Do not buy a motor until those are ruled out.
Step 4: Read and Interpret Electric Dirt Bike Error Codes
Modern controllers speak in codes. Learn the language and half your work is done.
- Throttle signal fault - code points to the throttle or its wiring
- Hall sensor fault - one or more motor sensors failed
- Controller overheat - the unit is protecting itself
- Low voltage - the pack is sagging or the BMS cut out
Step 5: Inspect the Controller, Wiring Harness, and Phase Wires
A melted connector is a confession. The bike is telling you where the heat built up. But before you start pulling plugs, learn to read the diagram, because every controller on the market uses a different pinout, and guessing costs controllers.
How to Read a Controller Wiring Diagram
You do not need the manufacturer's proprietary schematic to make progress. You need to identify four wire groups by function:
- Power in, thick red and black from the battery, usually through a fuse or breaker
- Phase out, three thick wires (often yellow, green, blue) to the motor
- Hall/sensor, the 5- or 6-pin connector covered in Step 3
- Control inputs, thin wires for throttle, brake cutoff, kickstand, display, and sometimes PAS
Bench-Test the Phase Wires
With the battery disconnected and the controller unplugged from the motor, set the meter to resistance (ohms) and measure across each pair of phase wires at the motor connector:
- Yellow to Green, Green to Blue, Blue to Yellow
- All three readings should be close to each other, typically a fraction of an ohm on a healthy motor
- A reading that is dramatically higher, or open (OL), points to a broken winding or a bad internal connection
- A reading near zero across any pair suggests a shorted winding
Inspect the Harness End to End
Pull the controller and follow the wiring harness from the battery to the motor:
- Look for chafed insulation where cables rub the frame, the steering head, or the swingarm pivot
- Check the three thick phase wires for heat damage, discolored insulation, or a loose bullet connector
- Sniff for a burnt smell around the controller, burnt electronics have a distinct acrid odor
- Feel for a hot spot after a short ride; heat marks the resistance
Controller Error Codes and What They Point To
If your controller has a display or LED, write the code down before you clear it. A code that returns after a reset is a real fault, not a glitch. Common mappings:
- Throttle signal fault, throttle or its wiring
- Hall sensor fault, one or more motor sensors failed (go back to Step 3)
- Controller overheat, the unit is protecting itself; check for blocked airflow or a dragging brake
- Low voltage, the pack is sagging or the BMS cut out (go back to Step 2)
When to Stop and Bench-Diagnose
If the harness checks out, the phase wires read evenly, the Hall test passed, and the controller still faults, the controller itself is the suspect. That is when a proper bench diagnosis pays for itself, a shop can load-test the controller and confirm the fault instead of you buying parts on hope.
Common Electric Dirt Bike Motor Cutout Causes and Motor Stuttering Explained
Motor stuttering almost always traces to a sensor or connection, not a dead motor. The motor is usually the last thing to fail and the first thing blamed.
Here is how the symptoms stack up:
| Symptom | Most Likely Cause | First Check |
|---|---|---|
| Cuts out when you drop the stand | Kickstand safety switch | Switch click and wiring |
| Dies when you touch the brake | Brake cutoff switch | Microswitch and plug |
| Stutters under load | Hall sensor or phase wire | Hall test, phase connectors |
| Loses power uphill | Battery voltage drop | Pack under load |
| No power, no display | Main connector or fuse | Harness and fuse |
| Runs rough when wet | Water in connectors | Contact cleaner and reseal |
Notice the pattern. The motor is rarely the culprit.
Frequently Asked Questions
What are the most common signs of a failing electric dirt bike motor?
Watch for motor stuttering under acceleration, power loss on inclines, unusual grinding or clicking sounds, and a hot motor casing after short rides. If your bike cuts out mid-ride or the throttle response feels delayed, those point to sensor or controller issues. A multimeter continuity test on your phase wires and Hall sensors will confirm whether the motor itself is failing or if the problem sits elsewhere in the system. Catching these signs early prevents further damage to your controller and battery pack.
How do I test if my e-moto motor has a short circuit?
Set your multimeter to resistance mode and check each phase wire against the motor casing. You should read infinite resistance (no continuity). Any reading below infinite means the winding insulation has failed and the motor has an internal short. Also check phase-to-phase resistance; all three pairs should read nearly identical values. If one pair reads significantly lower, that phase is shorted. A shorted motor will often trigger controller error codes and cause immediate cutout when you apply throttle.
What should I check if my electric dirt bike turns on but won't move?
Start with the safety switches: kickstand sensor and brake cutoff switch. Both will cut motor power while the display stays on. Next, check the throttle signal with a multimeter; you should see voltage change smoothly as you twist. Then inspect the wiring harness connectors for corrosion or loose pins. If those check out, test your Hall sensors and read any error codes from the controller. A bike that powers on but won't move usually has a signal interruption, not a dead motor.
When should I replace my e-moto motor versus repairing it?
Repair makes sense for external issues: corroded connectors, damaged wiring, or a failed Hall sensor. These are fixable without opening the motor. Replace the motor when you find internal shorts, burned windings, or damaged bearings that have scored the stator. If your motor overheats quickly, smells burnt, or shows consistent phase-to-phase resistance mismatch, replacement is the safer call. A professional diagnostic service can confirm whether the motor or controller is actually at fault before you spend money on parts.
A cutout on the trail is frustrating, but it is almost never a mystery. Work the steps in order, test before you replace, and you will find the fault fast. When a part genuinely needs replacing, RYVOX stocks genuine components, verifies fitment against your exact model and year before shipping, and only carries parts our own team runs. Text the shop and we will help you sort the real problem from the noise.