
How Do You Install Floating Brake Rotors on an E-Moto?
Learn how to install floating brake rotors on your e-moto with our step-by-step guide. Get the right tools, torque specs, and a fitment checklist.

Last Updated: November 9, 2026
Quick Summary
To install floating brake rotors, first confirm bolt pattern, offset and diameter match your hub, then remove the old rotor and clean the hub face. Hand-thread the new rotor bolts, tighten in a crossing pattern in three stages to the manufacturer's published torque, and re-check torque after the first ride.
- Measure your stock rotor's offset with calipers and compare it to the new part before ordering.
- Hand-thread every bolt before final torque to avoid cross-threading the hub threads.
- Tighten in a crossing sequence at roughly one-third, two-thirds, then full torque.
- Apply thread locker to clean, dry bolt threads and anti-seize only on the hub-to-carrier surface.
- Re-check bolt torque after the first ride using paint marks as a visual guide.
Table of Contents
- Floating Brake Rotor Fitment: The Compatibility Checklist
- Floating Rotor Installation Tools: What You'll Need
- Step-by-Step: Removing Your Old Rotor
- Installing the New Floating Rotor and Mounting Hardware
- Floating Brake Rotor Bolt Torque: Getting It Right
- Floating Brake Rotor Inspection and Bedding-In
- Long-Term Maintenance and Failure Analysis
- Get Your Floating Rotor Kit and Install Help at RYVOX
- Frequently Asked Questions
Floating Brake Rotor Fitment: The Compatibility Checklist
A floating brake rotor is a two-piece disc where the friction ring connects to a separate aluminum carrier through rivets or pins, letting the ring expand as it heats.
Fitment is where most installs go wrong. A rotor that bolts on but sits at the wrong offset will drag, pulse, or chew through pads. So before you touch a wrench, confirm three things: bolt pattern, offset, and diameter.
Verify Your Bolt Pattern and Offset
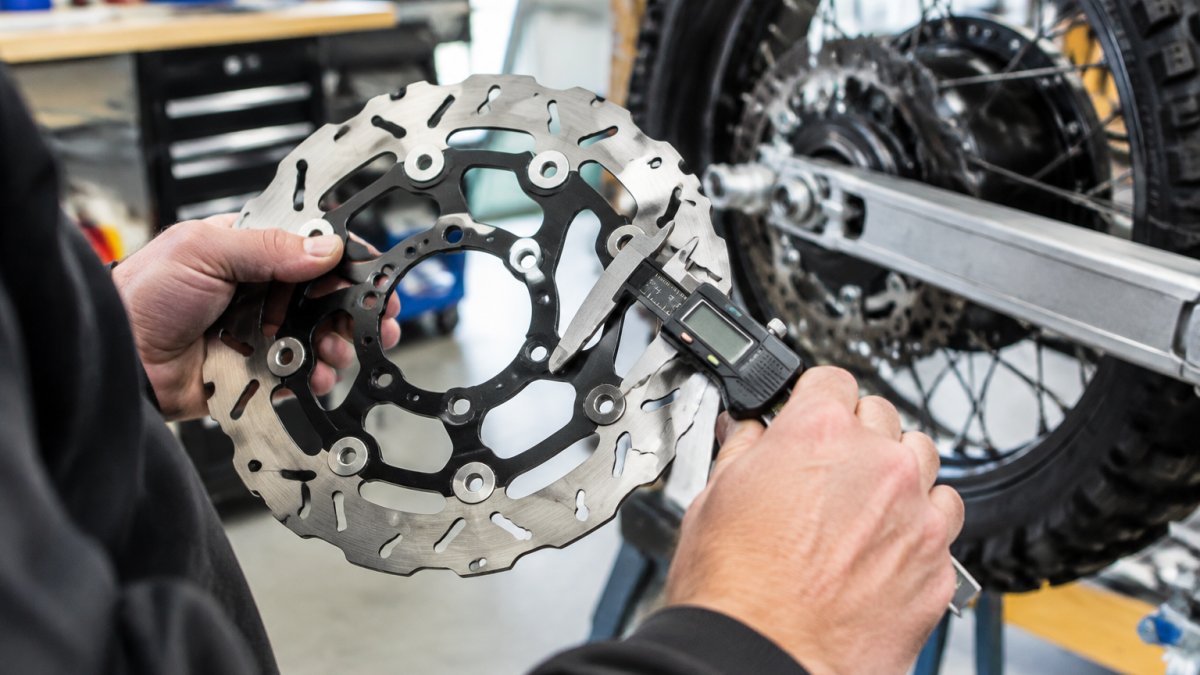
Bolt pattern is the number of mounting holes and the circle they sit on. Match it to your hub exactly. Offset is the distance from the mounting face to the friction ring, and it decides whether the rotor sits centered in the caliper. Measure your stock rotor's offset with calipers and compare it to the new part. A small mismatch changes brake feel immediately.
Check Rotor Diameter and Caliper Clearance
A larger swept diameter means more braking use, but it also moves the pad contact point outward. That usually needs a caliper adapter or bracket to reposition the caliper.
Floating Rotor Installation Tools: What You'll Need
Floating rotor installation tools are mostly standard shop items, plus a few consumables that make the job safer. You do not need a specialty press for a bolt-on floating rotor.
Essential Hand Tools and Consumables
- Socket set matching your rotor bolts
- Torque wrench in the low range
- Torx or Allen bits as required
- Needle-nose pliers for circlips and bobbins
- Flathead screwdriver for gentle prying
- Brake cleaner and lint-free shop towels
- Thread locker and anti-seize
- A clean work surface and a parts tray
Per Park Tool's rotor installation guidance, hand-thread every bolt before you apply final torque. Cross-threading a hub thread turns a 20-minute job into a hub replacement.
Step-by-Step: Removing Your Old Rotor
Removal is straightforward, but sequence matters. Support the bike so the front wheel is off the ground, then loosen the rotor bolts while the wheel is still mounted if you can, since the wheel holds the assembly steady.
- Lift and secure the bike.
- Remove the wheel or clear access to the rotor.
- Loosen and remove the rotor bolts in a crossing pattern.
- Lift the old rotor off the hub.
- Clean the hub face with brake cleaner and let it dry.
Keep track of bolt condition. Stretched or corroded hardware should not go back on. Watch out: never pry a seized rotor against the hub face with a screwdriver, because a gouged mounting surface will cause runout you cannot torque away.
Installing the New Floating Rotor and Mounting Hardware
Set the new rotor on the hub with the carrier facing the correct direction. Orientation matters, and manufacturers are specific about it. Wilwood's assembly guidance defines clear orientation requirements for rotor and floater plate placement, and Paragon Performance's assembly instructions standardize the same point for two-piece rotor hats.
Hand-thread each bolt first. Then snug them in a star pattern before final torque. If your kit uses circlips or buttons, seat them fully with needle-nose pliers and confirm each one is locked.
For riders replacing hardware at the same time, the Warp 9 E-Moto Titanium Rotor Bolts are a direct option for listed fitments, with rolled threads and a Torx T25 drive.

Floating Brake Rotor Bolt Torque: Getting It Right
Floating brake rotor bolt torque is the step people rush, and it is the one that causes the most comebacks. The torque figure is not a suggestion, it is the clamp load that holds the carrier to the hub. Too little and the rotor walks under braking; too much and you stretch the bolt or crush the carrier face. Always use the figure published for your specific rotor and hardware. Do not substitute a number from a forum thread.
Where the Number Comes From
Every rotor kit ships with a spec sheet, and that sheet is the only authority. If the sheet is missing, the rotor manufacturer's product page is the next stop. A common pattern is that two-piece rotors specify a lower figure than the stock one-piece disc because the aluminum carrier is softer than a steel hub face, over-torquing is the more common failure, not under-torquing. Write the figure on a piece of tape and stick it to the bike before you start.
Staged Tightening Sequence
Tighten in a crossing sequence, in stages, rather than hitting full torque on the first bolt. This seats the carrier evenly against the hub. Run the pattern three times: first at roughly a third of final torque, then two-thirds, then full. Between stages, look at the gap between the carrier and the hub face, it should close evenly all the way around.
| Stage | Action | What to Check |
|---|---|---|
| 1 | Hand-thread all bolts | No cross-threading; bolts turn by finger |
| 2 | Snug in star pattern at ~1/3 torque | Carrier sits flush, no visible gap |
| 3 | Re-run star pattern at ~2/3 torque | Gap stays even around the circle |
| 4 | Final torque in star pattern | Wrench clicks at spec on every bolt |
| 5 | Mark bolts with a paint pen | Reference for the post-ride re-check |
Thread Locker, Anti-Seize and Contamination
Thread locker goes on clean, dry threads, oil or brake cleaner residue stops it from curing. Anti-seize belongs on the hub-to-carrier contact surface, not on the bolt threads, because the two products do opposite jobs. Watch out: mixing the two on the same bolt (anti-seize on threads plus thread locker) gives you neither holding force nor corrosion protection, and the bolt can back out under vibration.
Reading the Result
After final torque, spin the wheel. A correctly torqued rotor runs true with no lateral movement at the carrier. If you see runout, loosen all bolts, reseat the carrier, and re-run the sequence, do not chase runout by over-tightening one bolt. Mark each bolt head with a paint pen so the post-ride re-check is a visual scan rather than a full re-torque.
Floating Brake Rotor Inspection and Bedding-In
Floating brake rotor inspection starts before the first ride, and the checks you run in the first ten minutes tell you whether the install is sound. Spin the wheel and listen. You should hear nothing. A light metallic tick from the bobbins is normal on some full-floating designs, but a scrape or a pulse means something is off.
Pre-Ride Inspection Checklist
- Radial float: the ring should move slightly on its buttons by hand without wobble at the carrier.
- Lateral runout: hold a straightedge or a dial indicator against the ring and spin the wheel; visible wobble means the carrier is not seated.
- Caliper centering: the caliper body should sit evenly over the ring with equal gap on both sides.
- Bolt witness marks: every paint mark from the torque sequence still aligned.
- Pad contact: pads should meet the ring across the full swept width, not hang off the inner or outer edge.
The Bedding-In Process
Bedding-in transfers an even layer of pad material onto the friction surface. A common pattern is ten to twenty progressively firmer stops with a cool-down between each set, then a full cool before any hard use. The air gap in a floating design isolates the hottest part of the disc from the carrier, which is exactly the heat you are managing during bedding-in.
Failure Analysis: What the Symptoms Mean
Most post-install problems announce themselves through one of four symptoms. Match the symptom to the cause before you replace anything.
| Symptom | Likely Cause | Fix |
|---|---|---|
| Pulsation through the lever | Uneven pad transfer layer or lateral runout | Re-bed the pads; check runout with a dial indicator |
| Metallic scrape at low speed | Caliper not centered or pad dragging | Re-center the caliper; check pad spring |
| Rattle over bumps | Worn or seized bobbins, or loose mounting bolts | Clean and free the buttons; re-torque bolts |
| Uneven wear band on the ring | Incorrect offset or wrong adapter | Re-measure offset; confirm adapter part number |
Post-Installation Checks
- Re-check bolt torque after the first ride, using the paint marks as a guide
- Confirm no fluid leaks at the caliper
- Look for uneven wear marks on the ring
- Spin the wheel cold and listen again
A pulse that appears only after the brakes are hot can point to uneven pad transfer rather than a bent rotor.
Long-Term Maintenance and Failure Analysis
Floating rotors are sometimes described as more prone to warping, and that perception deserves a straight answer. The float exists to allow thermal expansion, so the ring moves instead of stressing.
Common failure points:
- Seized bobbins from packed dirt and grit
- Stretched or corroded mounting bolts
- Contaminated friction surfaces from oily rags
- Incorrect offset causing uneven pad contact
Clean the buttons a few times a season with brake cleaner and work them free by hand. Check bolt torque at every tire change.
MDPI's engineering analysis of floating disc fixture layouts notes that improved fixture layouts can enhance braking system stability, which is a useful reminder that how the disc is mounted matters as much as the disc itself.
Get Your Floating Rotor Kit and Install Help at RYVOX
Fitment questions are the reason most installs stall, and we would rather answer them before you order than after. We check parts against your exact model and year before anything ships.
The ION 250mm Floating Rotor Kit includes front and rear rotors with caliper adapters for listed fitments. If you are correcting spacing, the Warp 9 V3 Rotor Hub Spacer, the Warp 9 caliper adapter spacer kit, and the Warp 9 front brake rotor adapter cover the common offset and clearance fixes.


Send us your bike details and we will confirm the setup before anything ships.
Brake upgrades reward patience more than speed. Measure twice, torque to spec, and bed the pads in properly, and a floating rotor will give you consistent feel long after a solid disc starts to fade.
Frequently Asked Questions
Do floating rotors make a difference?
Yes, especially under hard use. A floating brake rotor uses a two-piece design where the friction ring connects to the carrier with rivets or pins. This allows the disc to expand and contract with heat without warping, which keeps braking consistent and reduces brake fade during aggressive riding. The air gap between the hottest part of the disc and the carrier also helps manage thermal expansion, as explained in technical references on floating brake designs.
What should I check before installing a floating brake rotor?
Start with a fitment check: confirm the rotor's bolt pattern, offset, and diameter match your bike's hub and caliper. For example, a 250mm floating brake rotor kit will need the included caliper adapter brackets to align correctly. Ensure you have the right floating rotor installation tools, including a torque wrench and thread locker.
How do you check a floating rotor after installation?
After torquing the mounting bolts in a star pattern, spin the wheel and listen for scraping. Then, with the bike on a stand, grab the rotor at the top and bottom and try to rock it side to side. You should feel a small amount of radial float but no excessive axial movement. Hand-threading bolts first helps prevent cross-threading, a key step for a proper floating brake rotor inspection.
Can you replace a fixed rotor with a floating rotor?
In many cases, yes, provided the floating rotor's dimensions and mounting points match your hub. You may need a caliper adapter bracket if the new rotor is a different diameter, which is common when upgrading to a larger floating brake rotor for better heat dissipation. Always verify fitment against your exact model and year before ordering to avoid incorrect fitment issues.
